Duration of activity: 3 hours
Groups members participating: Michael Vilhelmsen, Heine Stokholm og Mads Møller Jensen
Dagens opgaver:
- Byg en robot i henhold til specifikationen på http://www.philohome.com/nxtway/nxtway.htm
- upload sejway programmet fra http://www.variantpress.com/books/maximum-lego-nxt
- Tweak konstanterne for at forbedre balanceevnen
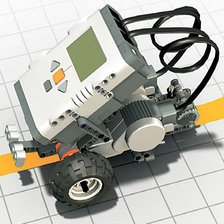
Robotten:
Vores robot Thor har i dag taget følgende outfit på:
Vores robot Thor har i dag taget følgende outfit på:

Programmet:
Programmet består af to hoveddele. En getBalance() og en pidControl() metode, hvor getBalance() sørger for at få valgt det rette offset.
Her har vi prøvet fire forskellige tilgange:
- At forsøge at få robotten til at balancere og derefter trykke på START-knappen. (Som var initialiseringen)
- At forsøge at få robotten til at balancere mens START-knappen var trykket i bund, så offset blev sat i det øjeblik START-knappen blev sluppet. -Dette var instruktorens idé, men vi havde problemer med at fornemme hvornår robotten var i balance på den måde.
- Vente 5 sekunder efter programmet var startet og så sætte offset til den værdi sensoren målte på det tidspunkt. På den måde kunne vi slippe for at skulle sende robotten ud af balance ved at trykke på START-knappen.
- Ved at hardcode offset. Vi lavede målinger med robotten for at finde den sensorværdi, hvor robotten var i balance.
pidControl() metoden udgør derimod kontrolenheden i vores feedbackloop. Den fungerer som sagt ved hjælp af et pid system der indeholder tre vigtige parametre, p, i og d. P står for proportional og det er den parameter der bestemmer hvor hurtigt robotten skal bevæge sig mod offsettet i forhold til hvor langt væk fra den ønskede position robotten er. I står for integral og sørger for at vores robot ikke kommer til at hvile i en position der ikke er vores offset, og d står for derivative og sørger for at vores robot sænker farten efterhånden som den nærmer sig den ønskede position.
afvikling:
En af vores første forgæves forsøg på at få Thor til at balance ser ud som følger:
Først prøvede vi at forbedre balanceevnen ved at ændre på den magiske error konstant. Det gjorde dog ikke den store forskel.
Vores næste tanke var at det måske kunne hjælpe at ændre på motorhastigheden. Vi prøvede at sætte hastigheden ned først for at undgå at robotten ville ramme forbi det satte offset, men igen uden meget succes og højere hastighed hjalp heller ikke meget.
Vi havde også nogle forsøg med at hardcode det offset som robotten skulle prøve at ramme. Det gav dog visse problemer da det optimale offset ændrede sig ofte på grund af at vores sensor ikke var alt for sikkert fastmonteret.
Det forsøg vi havde størst held med var da vi efter et hint fra instruktoren flyttede vores robot til et mere ensfarvet bord, og med lidt ekstra tweak af pid parametrene endte vi med følgende resultat: